")

Plumbing Basics 101: Mastering Gas Meter Safety
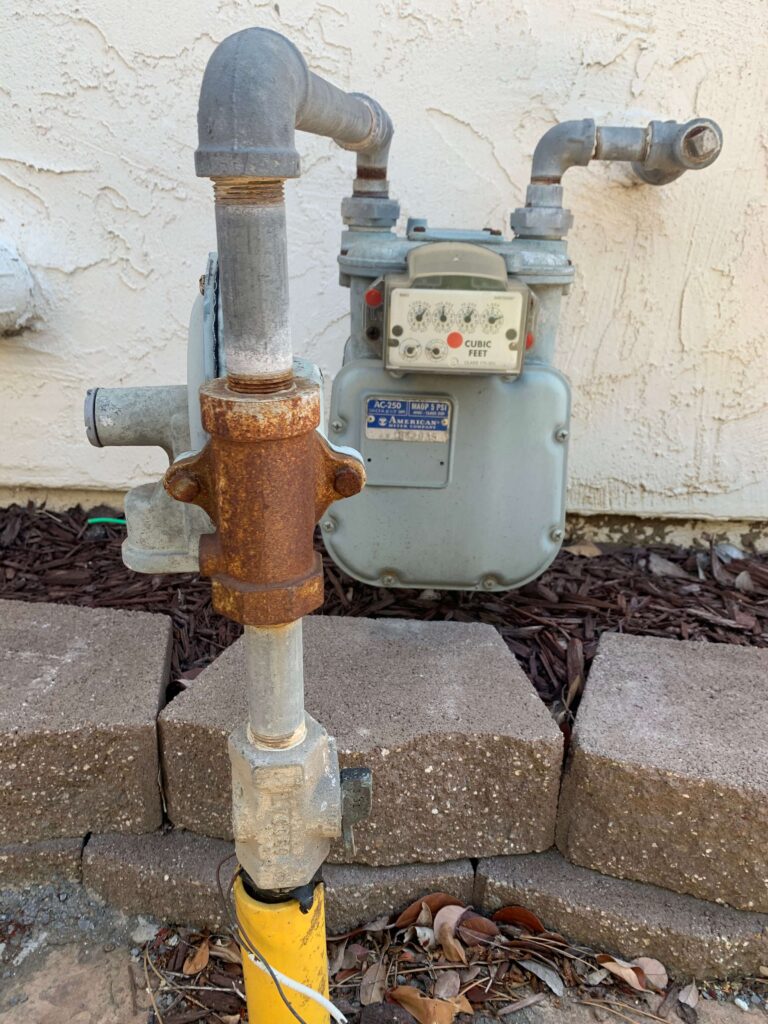
For most homeowners, knowing the location of their gas meter is common knowledge, but it’s worth confirming you’re familiar with its whereabouts. Locating and turning off your gas meter can be invaluable in times of emergency. While calling 911 or your gas company’s emergency line is crucial in gas-related emergencies, swiftly shutting off the gas at the meter can provide a vital head start and save precious time.
When approaching your gas meter, you’ll notice a pipe extending from the ground to the meter itself. Adjacent to this pipe lies the shutoff valve, conveniently positioned approximately 6 to 8 inches above ground level. With the aid of a 12-inch or larger adjustable wrench, turning the valve a quarter of a turn in either direction until it’s perpendicular to the pipe is all it takes to shut off the gas flow.
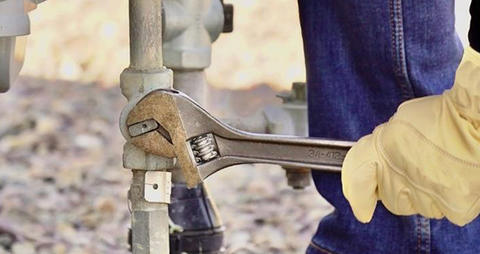
To ensure readiness for any unforeseen circumstances, it’s wise to keep a 12-inch or larger adjustable wrench alongside your emergency supplies or near the valve for quick access. However, remember not to store the wrench directly on the meter or any natural gas piping or equipment for safety reasons.
Lastly, only your gas company can restore natural gas service once it has been shut off. Contact your gas company promptly for assistance.
Plumbing Basics 101: Master the Art of Quick Water Shut-Off
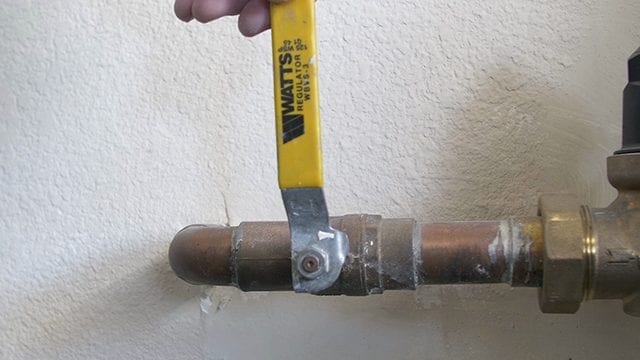
Imagine discovering a water leak in your wall or, worse yet, a burst pipe. In such situations, swift action is paramount to minimizing damage. Fortunately, every home is equipped with a water shutoff valve, and individuals high school age and older need to know how to operate it efficiently.
Locating the water shutoff valve is the first step. In most cases, you can locate the shutoff valve positioned near the incoming water supply. A helpful guideline is mentally tracing an imaginary straight line from the meter to your home; typically, you’ll find the shutoff valve along this path. Depending on the layout of your home, it might be near the water heater or on the exterior of older homes.
By grasping the simple skill of quickly shutting off your home’s water supply, you can prepare yourself to tackle unexpected leaks or bursting pipes, safeguarding your property from potential damage.
Mastering Water Meter Safety: Empower Yourself with Essential Know-How
Your water meter holds two important shutoff valves: one controlled by the water company and the other designated for homeowners’ use. While you may rarely need to utilize the meter’s shutoff valve, especially if you’ve already located your home’s shutoff valve, understanding its function is crucial. Beyond tracking water usage, the water meter serves as a valuable tool for detecting leaks within your home.
Each water meter is equipped with a flow indicator designed to alert homeowners to potential leaks. To shut off the water supply to your home using the meter, turn the handle a quarter clockwise. If you’re unfamiliar with the process, conducting a trial run is a wise precaution.
Unlike gas meters, where only the gas company can restore service, homeowners have the authority to turn their water meter on and off as needed. By familiarizing yourself with this procedure, you’re taking proactive steps to safeguard your home against potential water-related emergencies.
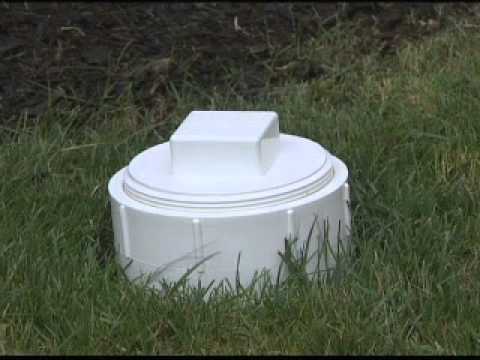
Plumbing Basics 101: Discover the Location of Your Property’s Cleanouts
Your sewer cleanout is a valuable asset within your plumbing system, designed to ease the process of clearing blockages. Consisting of pipes fitted with caps for easy access, it serves as a gateway to promptly address any issues within the sewer line. The lateral sewer line connecting your home to the main public sewer system relies on these cleanouts for efficient waste disposal.
Typically positioned along the lateral sewer line, cleanouts ensure seamless maintenance whenever needed, guaranteeing uninterrupted wastewater flow. By knowing the location of your cleanouts, you empower yourself to swiftly address any potential blockages, thereby maintaining the smooth operation of your plumbing system.
Understanding the significance of cleanouts and their accessibility is vital for every homeowner. So, Plumbing Basics 101 encourages you to familiarize yourself with the whereabouts of your property’s cleanouts so you’re well-prepared to tackle any plumbing challenges that may arise.
Essential Tips for Homeowners: Conquering Hard Water Deposits
In the realm of household remedies, it’s easy to recall scenes from movies like My Big Fat Greek Wedding, where characters swear by unconventional solutions like Windex for almost anything. While vinegar and baking soda indeed have their merits, there are more effective products available for certain tasks.
For instance, when faced with hard water deposits on your faucet aerators, consider the simplicity of replacing them instead of struggling to soak them away. With just under $8, you can refresh four faucet aerators, saving time and effort.
Similarly, tackling mineral deposits on shower heads might seem like a job for vinegar, but there are more efficient solutions. Products like CLM®, costing less than $15 for 80oz, are specially formulated to eliminate calcium, rust, and lime deposits with ease. With enough supply to a year’s worth of cleaning, maintaining your showerheads is a smart investment.
Let’s approach the challenge of hard water deposits with practicality and ingenuity. While vinegar and baking soda have their place, exploring alternative products tailored for specific tasks can yield better results. Remember, a little research can go a long way in finding the perfect solution for your needs.
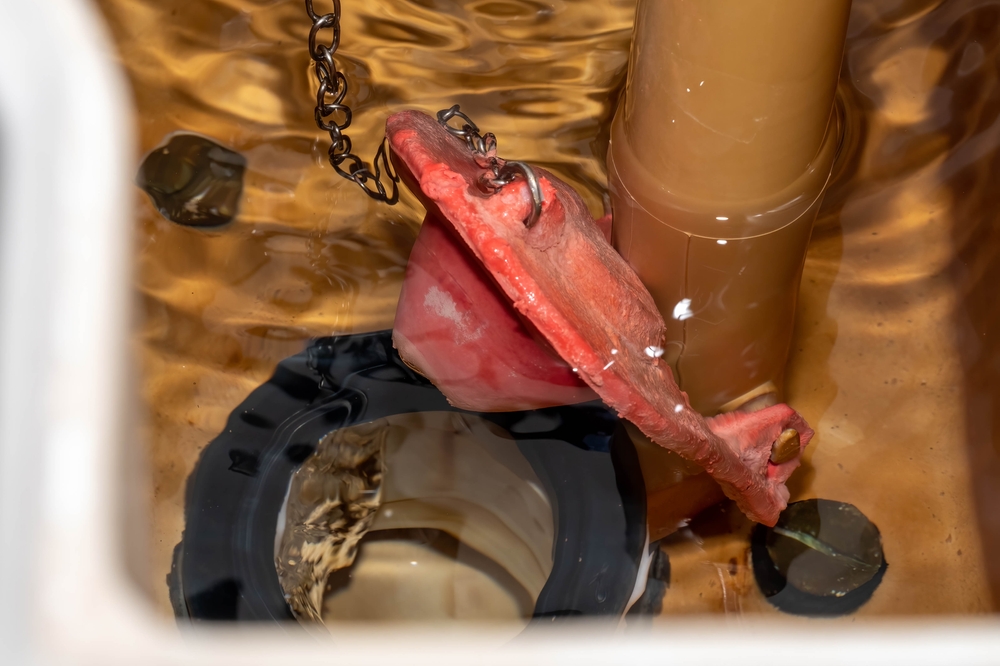
Plumbing Basics 101: Mastering Toilet Flapper Replacement
Changing a toilet flapper is a task anyone can accomplish, regardless of DIY expertise. The most challenging part? Make a quick trip to your local home center to pick up a new one!
Here’s a simple step-by-step guide:
1. Turn the Water Off:
Locate the water supply valve near the base of your toilet and turn it clockwise to stop the flow of water.
2. Flush the Toilet:
Give the toilet a flush to empty the tank entirely. Confirm there’s minimal water left inside before proceeding.
3. Remove Your Old Flapper:
Lift the lid off the toilet tank and locate the old flapper, typically attached to the flush valve at the tank’s bottom. Disconnect the chain or strap linking the flapper to the flush lever. Remove the old flapper from the flush valve. If you’re new to this task, taking a quick photo before starting can be helpful.
4. Install Your New Flapper:
Securely fit the new flapper onto the flush valve to create a tight seal. If it comes with a chain or strap, adjust its length for proper closure after flushing. Don’t forget to take the old flapper with you to the home center for a match-up.
5. Turn Your Water Back On:
Restore the water flow to the toilet by turning the water supply valve counterclockwise.
6. Test the New Flapper:
Flush the toilet several times to confirm the new flapper’s functionality. It should close tightly and form a seal with each flush.
7. Adjust The New Flapper if Necessary:
Fine-tune the chain length if the flapper doesn’t close smoothly or has excessive slack.
8. Replace Your Tank Lid:
Once satisfied with the flapper’s performance, carefully place the tank lid back on top. No tools required!
By mastering this straightforward task, you’ll enhance your toilet’s efficiency and prevent water wastage from leaks. If you encounter any persistent issues or difficulties, it might indicate a larger problem, prompting the need for professional plumbing assistance.